Building a more open video conferencing and smart TV alternative
The goal here is to build something that can operate with your TV/monitor and act as a dedicated box for video conferences using any platform you choose including the free and open source Jitsi Meet and Jami/Together. The experience of video calling at home while you sit on a couch or comfy chair is great. The entire experience on a larger than your laptop screen and quality sound really raises video chats with friends to as close to hanging out in your living room as possible.

What you will need
-
Pine64 Single Board Computer (~$125 for all the below from Pine64)
- ROCKPro64 (2GB ram) ($60)
- Heat sink 20mm (not necessary, but nice) ($3.29)
- 16GB SD card ($10)
- 16GB eMMC (not necessary, but nice) ($16)
- Wifi/Bluetooth adapter ($15)
- 5A power supply ($13)
- Box ($9)
- USB speakerphone (speaker/mic) ($60)
- HD webcam ($15)
- Air mouse/keyboard (not necessary, but nice) ($25)
Total $225.
You will also need to use your monitor or TV with HDMI cable.
I will be testing the PINE H64 “Model B”-2GB Single Board Computer as an alternative to the RockPro64 soon which – if it works well – will knock about $45 off the price.
Alternatives to Pine64 exist, but the Pine64 community is dedicated to Linux and open source development.
Getting it together
Putting together a video conference system becomes expensive only because of the speaker phone that is necessary to use to make sure you have clear sound and no feedback/echo on the calls. This is easy on your laptop, but if you want an experience that is more like meeting in person you need something better. And, that means you need something with noise canceling built in (Kaysuda makes an inexpensive one that works with Linux).
There are a range of speakerphones out there with Bluetooth and other inputs (eMeet makes a good one), but this pushes the price up a lot. This might be worth it if you are thinking you will have conference calls using your phone or other devices. Or, if you want to splurge on quality wireless sound.
The goal here is to build something that can operate with your TV/monitor and act as a dedicated box for video conferences using any platform you choose including the free and open source Jitsi Meet and Jami/Together. It is my hope that Signal will provide a build of their chat/video/call software for the ARM-based chips like this one.
The experience of video calling at home while you sit on a couch or comfy chair is great. The entire experience on a larger than your laptop screen and quality sound really raises "chats with friends" to as close to hanging out in your living room as possible.
Sure, you can plug your laptop into the TV and do the same thing, but then your laptop is tethered to TV with a thick HDMI cable, the sound is going to be terrible, and you are going to be a blurry dot on the call.
The market for the Facebook Portal is folks who do not want to fuss with technology. While this take a little more activity than products you buy off the shelf, it is worth it in the end not to have surveillance tech in your living room.
This is an open source solution to the proprietary lock-in of these other services. At the end of this you will have a Linux-based Smart TV and video conferencing system and a cool looking Pine64 device. There are other devices pre-built that run Android, but they can be almost twice this set-up and much less fun.
Putting the SBC together
Single board computers are a do it yourself project. You get the parts in separate boxes, but it is easier to put together than anything you get from Ikea. Basically, it is:
- Four Phillips screws holding the board to the acrylic box.
- Attaching the wifi/bt module (aligning small pins with holes)
- Attaching the eMMC module (aligning the plug)
- Sticking the heat sink tape on the heat sink and clipping it to the board.
- And attaching the two bits of acrylic with the four metal rods.
- Sicking the antenna to the acrylic box.
Took about 15 minutes. I went slow being careful not to touch the board except on the edges so as not to static shock the components.
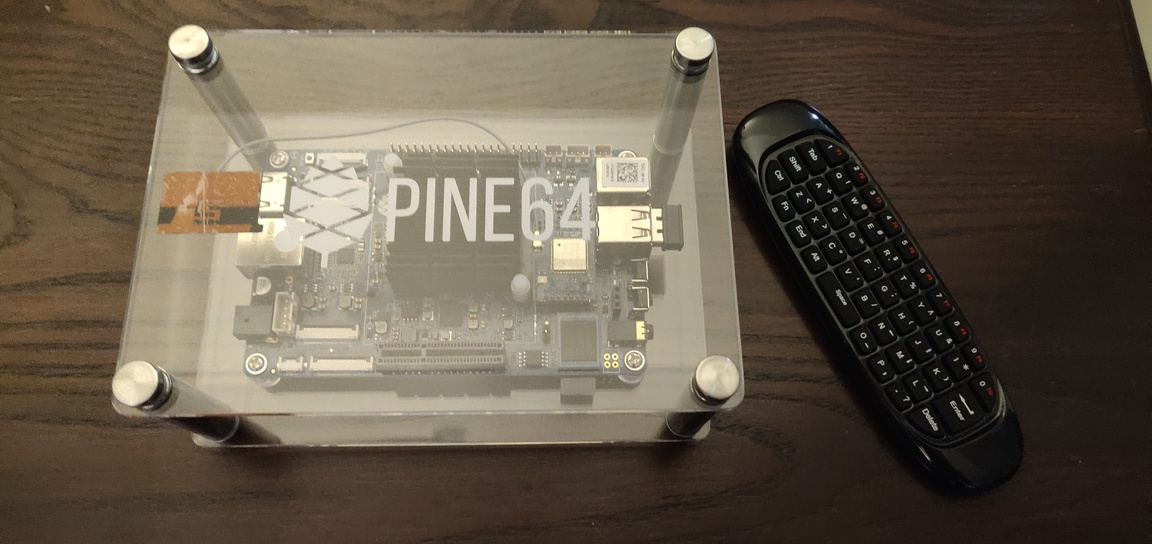
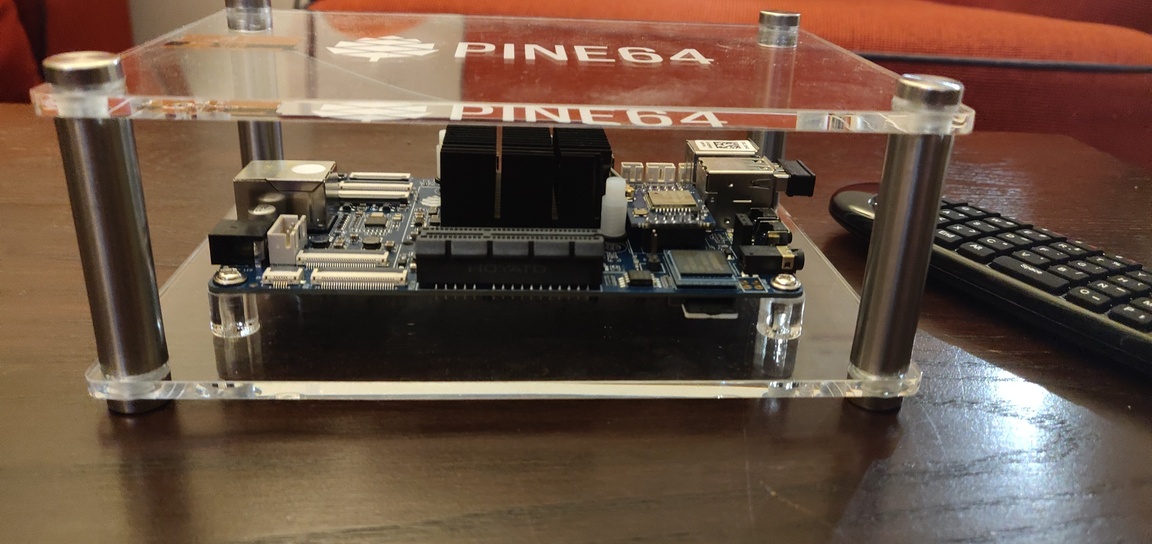
When put together, it is a nice looking box with the Pine64 logo on the top and a cool looking chip floating inside.

Software
I tried all the software on the page. This took most of the time getting this together. I first tried the Manjaro installs. I am a huge fan of Manjaro because I am a huge fan of Arch Linux, but I am lazy and Manjaro takes the work out of installing Arch. Unfortunately, when I tried them the only one that works was the 20.10 version of i3 Manjaro. This would have been great for me – I love i3 and use it as my daily driver. Unfortunately, this is probably not a good introduction to Linux given the commands are keyboard-based, not mouse based.
I found that the boot issue I was experiencing on most of the Debian and Arch/Manjaro versions had to do with the new boot system. I am proficient in Linux, but was not going to try to fiddle with this. Also, I wanted the on-board wifi/bt chip to work.
The LibreElec would have been my preferred option, but it did not work well with the wifi/bt module.
That left two options for me:
- ayufan's builds of debian/Ubuntu.
- ChromiumOS (also by ayufan)
Both worked great and the wifi/bt chip was immediately identified (contrary to everything that is written about this board I read online about the Linux builds disabling it).
Installing the software
I have a Pinebook Pro and used it to install everything. The Pinebook Pro is amazing and use it all the time for writing and (pre-pandemic) lugging around to cafes. The battery life is great and the i3 community build of Manjaro flies on in it.
The Pinebook Pro also has a nice little micro-SD port that makes writing to the micro-SD super easy.
You download the image files linked from the Pine64 ROCKPro64 wiki page.
If you are using another machine that doesn't run Linux, the best thing to do is use Etcher and skip the next few steps. Etcher (though I have not used it personally) seems to make this much easier for those not used to the command line.
For those with Linux or like the command line:
Decompress the image:
unxz image-file-you-downloaded.img.xzFind your sd card:
lsblkIt is the 16GB card. On the Pinebook Pro it is /dev/mmcblk0. On other machines it is likely /dev/mmcblk1 or /dev/sdb or /dev/sdc.
Then, write the image to the card:
dd if=image-file-you-downloaded.img of=/dev/mmcblk-something-above bs=1M status=progressWhen it is finished, eject it from the computer and plug the SD card into your ROCKPro64 SD card slot (right under the eMMC module you installed).
Booting
I chose Bionic LXDE from the stable install list page and it just worked on boot when I plugged the Pine64 system into the power supply. The Mate install worked fine when I tried it, but it is a little heavy for my tastes since all I want is a browser and maybe install Kodi.
Using the Air Mouse was fun and it was easy to navigate the menus on the screen.
Next was installing the ChromiumOS to the eMMC chip. Same as before, but downloading it to the new Pine64 LXDE system and running:
unxz chromiumOS-image.img.xz
lsblk
dd if=chromiumOS-image.img of=/dev/mmcblk1 bs=1M status=progress
Rebooted and it booted directly into the ChromiumOS. Added the connection to the wifi and launched into "guest".
I followed the post-install instructions on the ChromiumOS page. I have put those instructions below. Things may change, so please visit the ChromiumOS page. You will need the DRM if you want to watch streaming content online using the ChromiumOS browser.
Resize the STATE partition and install Widevine DRM
ayfan writes: "The build supports Widevine DRM, but does not ship the binary as this is against Google license. You can install it manually, but first follow the resize manual:"
After installing Chromium OS you should resize STATE partition:
Press: Ctrl+Alt+F2,
Login: chronos (this is automatically filled in)
Password: chronos
Type:
sudo rockpro64-resize-statefs.sh
sudo rockpro64-install-widevine.sh
Password: chronos
Reboot by typing:
sudo rebootAnd, that's it.

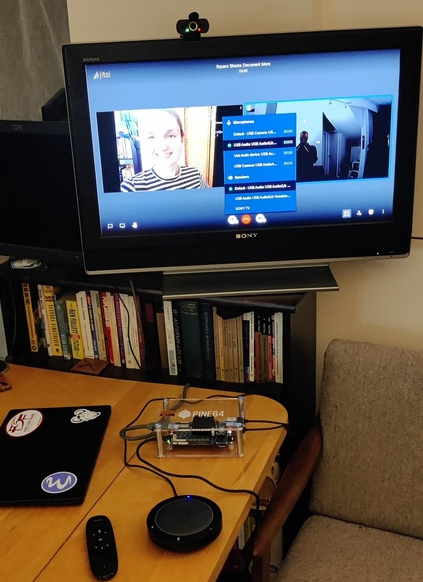
The Pine64 with the ROCKPro64 single board working as video conferencing.
